Monday, January 24, 2011

The Angel Academy of Art's Academic Process Videos

Hi all!!! My old school in Florence, Italy The Angel Academy of Art just sent me these great videos on the school and it's working process. The videos were shot very well and it made me home sick to go back and study there. It's been four years since I graduated and been in a class room environment. I miss the friendly competition and the sharing of technique and ideas. Looking back I realize how much I really learned at the Angel Academy. Being a professional tattoo artist for over fourteen years I thought I knew a thing or two about art and drawing. After studying at Angel under Michael John Angel, Jered Wiznicki, and Martinho Isidro Correia I found out that under there shadow I had a lot to learn. The three instructors basically built me up from scratch and taught me an invaluable discipline that I'm still trying to perfect. 

So these videos are the first two of three that give a brief overview of the deep academic process of the Angel Academy of Art. I either could not find the third video or it is just not finished. If anyone is Planning to study in this tradition and has the monetary means I would definitely consider checking out Angel.

I look forward to seeing the third video and when I do I'll make sure to update this post. 


Wednesday, December 29, 2010

Contemporary Masters Show


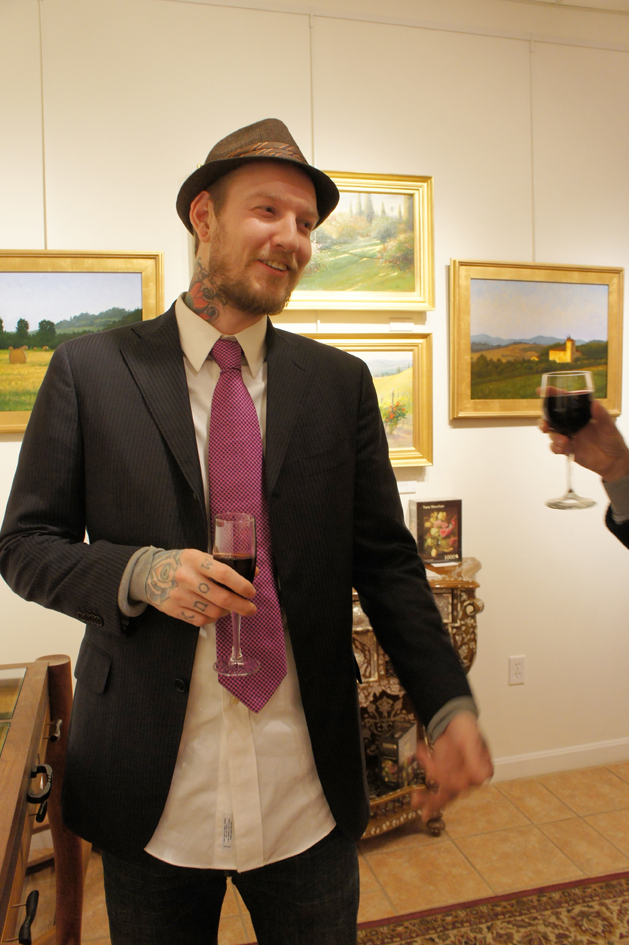
Hello All!!! I wanted to share photos of opening night at the Royal Gallery last December 9th. It was a wonderful night of friends, laughs and art. I was pleased with the turn out and also the many new faces that visited the gallery. For the first time I was able meet the other artist that are represented by the gallery. Over all It was a great time and experience sharing our art with Rhode Island.


Sunday, December 19, 2010

The Skull Demo

The Specimen


Hey Everyone, I wanted to take this time to post another painting demo base on how I paint red fabric. Countless times people asked how I did it, what colors that I used and what was my painting process. Well to start this is a technique that I learned while studying still life painting at The Angel Academy of Art in Florence, Italy. After cast painting learning to render red cloth was our first task to tackle in still life.
The idea behind painting red is having a wide range of value  maintaining a high chroma throughout. That being said how does one lighten red without changing it to pink or orange? Any addition of white will not only make pink but lower the chroma. Orange can work well to lighten red only a couple of values while maintaining its chroma but not 100% convincing. The way in which I was taught was a type of glazing technique. In the nature of glazing, applying a thin and darker value over a light ground will with most colors retain and heighten it's chroma. So in this demo I will be using the lightest value ground I can think of, the white of the oil primed linen. The majority of the glazing will be done with transparent and semi-transparent reds.

sight-size set up


I started the drawing for this still life using the sight-size method. I find it the easiest way to check my proportions, angles and form relationships. I can simply flick my eyes back and forth to check for drawing errors and then change them just as fast as they are noticed. Instead of drawing with oil paint directly on the linen I opted to start  by using pencil on paper. I find I have more control over the composition of the painting before I transfer it onto the linen. Starting in this way is also beneficial in this painting in order to maintain the white of the ground. Any stain or residue of color on the white ground will detract from the luminosity of the future red glazes.

The skull transferred to linen


After I have transferred the finished drawing onto linen I can then start the underpainting. I carefully wash raw umber into the background and skull being mindful no to contaminate any of the areas that will be red.

The Raw Umber wash drawing.


When the Raw Umber wash was dried I toned the background and shadows with Ivory Black.

Wash drawing toned with black.


The next stage is what they called the first painting stage at the Angel Academy. This is the stage where all of my first guesses are made in establishing all the other colors and tones. This is the first time that I visit the red cloth area. I used Scarlet Red from Winsor and Newton for the first layer in rendering the cloth. I don't use any medium to apply the red, I just scrub it in with a bristle brush. The important thing to keep in mind is to apply leave a thin even layer.

First Painting Stage


I continue to rework the skull and background elements trying to resolve drawing errors. Because I was able to state in a general way the the colors and tones I'll be using I can start to render and bring to a finish the small forms. At this time I'd like to finish as much as I can to let the red I just applied to dry thoroughly. Each layer must be dry so that older layers do not lift.

Refinements of first-painting.


I used Cad. Red lt.,Cad Red med. and Alizarin Crimson to scrub over the dry bright red base. I started with Cad Red lt. first working from light to dark. My brush was almost dry so that I could incrementally darken the cloth with the most control and not over work any of the areas. For every darker value red I added I had to let the previous layer dry. The shadow areas of the red I used a Persian Red base and glazed with Alizarin Crimson and Ivory Black.

The final Product.


With a lot of time and patience you can arrive at an impressive affect that is difficult to achieve with Direct painting methods. I hope that I could answer some of the those technical question people have asked me over the years. If anyone has any other question feel free to leave a comment. Thank you very much.

Sunday, December 5, 2010

New Landscapes

Hey everyone, I just wanted to share with you a couple of new Landscapes I got ready for my up coming show. Both of these paintings will be available for sale at the Royal Gallery in Providence, RI. I painted few others that are waiting for a coat of varnish, so I haven't bothered to take photos yet.
 The Tuscan Haystacks
                                          

Into the Fog
                                                

Into the Fog was actually a watercolor I had Painted a few years ago. I had decided to see what it might look like as an oil painting. I really had a lot of fun trying to liven up the neutral color of the fog breaking it up with some high chroma notes.
I hope that you enjoy and I hope to add the rest of the paintings as soon as they are varnished.

Sunday, November 28, 2010

American Art Collector Magazine


I am happy to announce that recently American Art Collector Magazine (Dec. issue, 2010) had contacted me to contribute a few words on my work in the up coming show at the Royal Gallery in Providence RI. This up coming January mark the two year anniversary of my involvement with the Royal Gallery. Since my first solo show with them it has been nothing but success and great reviews from the public and press. So I'm looking forward to this group show titled Collection of Contemporary Masters scheduled to run from Nov. 30, 2010 - Jan. 9,2011. I will be showing a portion of my work that I have been preparing for my next solo show in April. You can look forward to seeing many of my new landscapes I painted during my last stay in Italy. I hope to see you soon at the show and make sure to contact me if you need more information. All the best and Happy Holidays.


Wednesday, October 20, 2010

The No Evil Series


The No Evil Series is a triptych that I worked on during my last stay in Italy. The idea actually came to me from a tattoo client. He wanted the typical monkey motif we all know. He being a client that I've tattooed for a number of years I was able to offered him an other perspective to his idea. I suggested that we come up with and alternative subject other than the monkeys and still keep with in the meaning of the piece. The best thing I came up with was an other typical tattoo image, the skull. We placed three skulls side by side with a red fabric and roses intertwined and holding together these heads. The fabric doubled as a device of unity and in covering the eyes, ears and mouth of the skulls instead of hands.
Ever since I made that tattoo I've wanted to reuse the essence of that image. As you will see I have again changed the objects but the meaning is still there. I hope that you enjoy the work and thank you for viewing.


Hear No Evil

See no Evil
Speak No Evil


Monday, October 4, 2010

GCA Drawing Competition Update


John, Pencil on Paper.


So here is my drawing for the  GCA competition. I had a wonderful time and learned a lot from the other competitors. It was a joy to watch how the other artist approached there drawing and each take them to a finish. I don't believe I had ever worked so intensely on a single drawing. We all started our days at 9 am and finished at 6 pm with only an hour break for lunch. This went on for five days and we were all tired by the end of the contest. My hat goes off to our model John for standing there and posing the whole time. John was really a trooper and not once did we need to crack the poseI hope to participate next year and work amongst those great artist another time. Thank you all who was following the event and encouraging me the whole way.